The way in which you move blocks in Gutenberg changed a while back with the release of WordPress version 5.5. We’ve put together this short video that shows how to move blocks in the WordPress block editor, and there are written instructions on this below the video.
The ‘add block’ button has changed
A small change, but the ‘add block’ button is now a square rather than a circle. You can see the difference below. This is just an aesthetic change – the button works just as it did before. There are also some changes to the ordering of the options in the top left hand corner of the editing screen.


The grab bar to the left of each block has gone in WordPress 5.5
In the previous version of Gutenberg there was a ‘grab bar’ to the left of each block. You could click the up and down arrows to move the block one space up or down, and you could grab the whole block using the central section and drag it anywhere on the page, as per the example below.

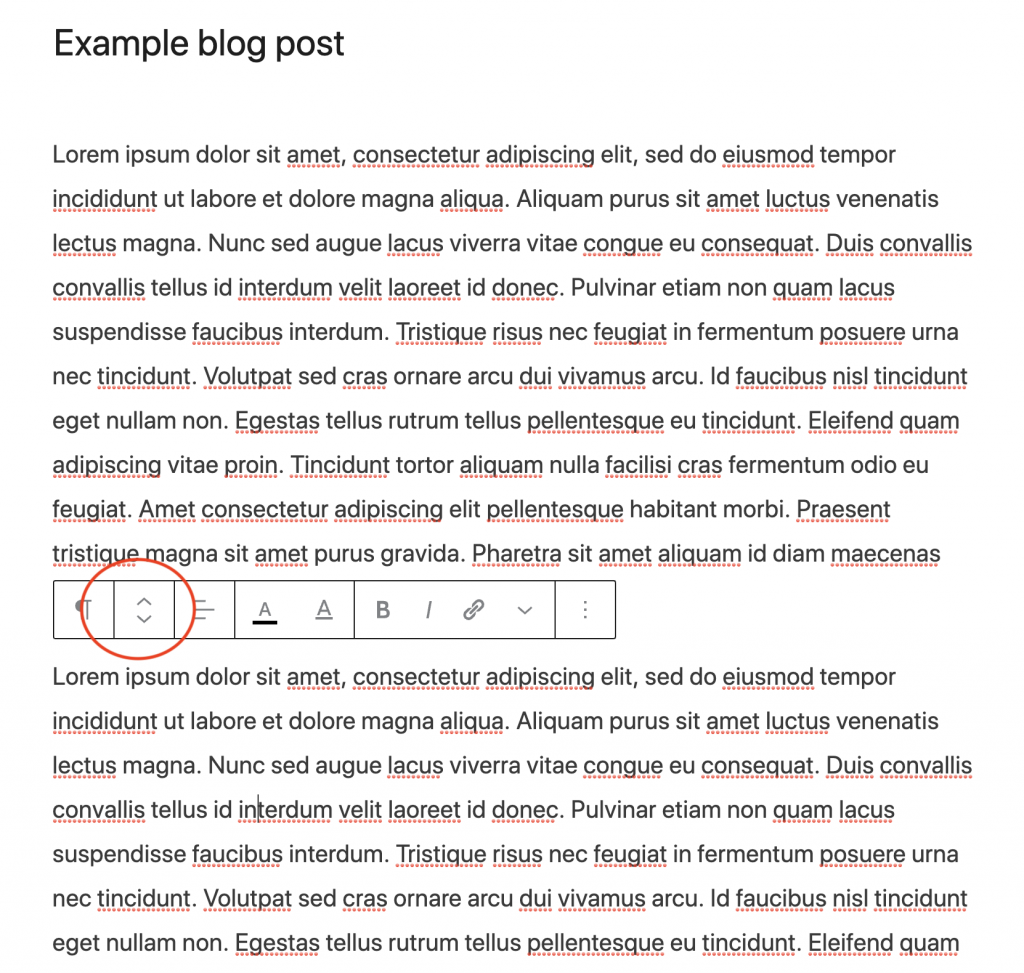
This isn’t the case anymore. You’ll see that there are no longer up and down arrows or grab bars to the left of the block. Instead this functionality is controlled by the bar that appears at the top of the block. Take a look at the screen shot below to see this.

To move the block up or down one position at a time you can use the up and down arrows here which work exactly the same as they did before. To drag and drop the block into a new position you can hover over the arrows, click and then keeping the mouse click down, move the block to its new position. Release the mouse click when you’re happy with the new position.
This works the same as the grab bars in the old interface although you really need to know that it’s there to be able to use it – there’s no visual clues to tell you that this is how it works.
Using the keyboard to move blocks in WordPress 5.5
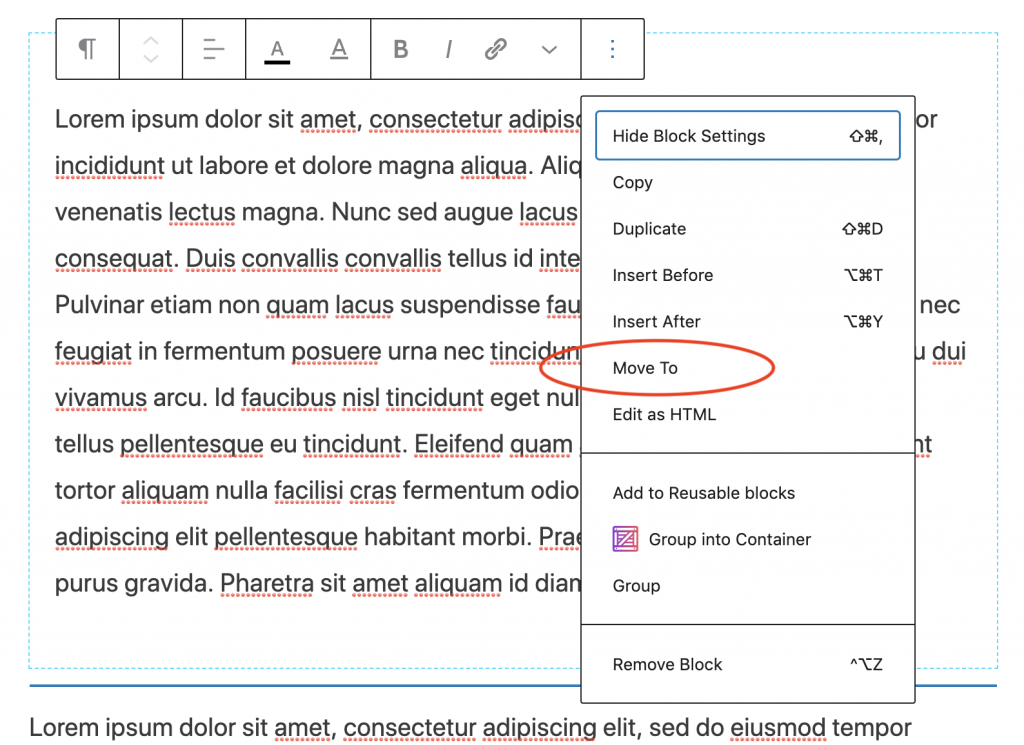
There’s a new look to the block admin menu in WordPress 5.5 which now features a ‘move to’ option (see the screen grab below).

This offers another way of moving blocks. You can click on ‘move to’ and then use the up and down arrows on your keyboard. Once you’ve navigated to the right place on your page press enter and the block will move into that place. You can use this to move the blocks to another position on the page but not to nest them within other blocks. If you want to nest a block in another block then you will need to either drag and drop it or use the copy and paste method detailed below.
Copying and pasting blocks.
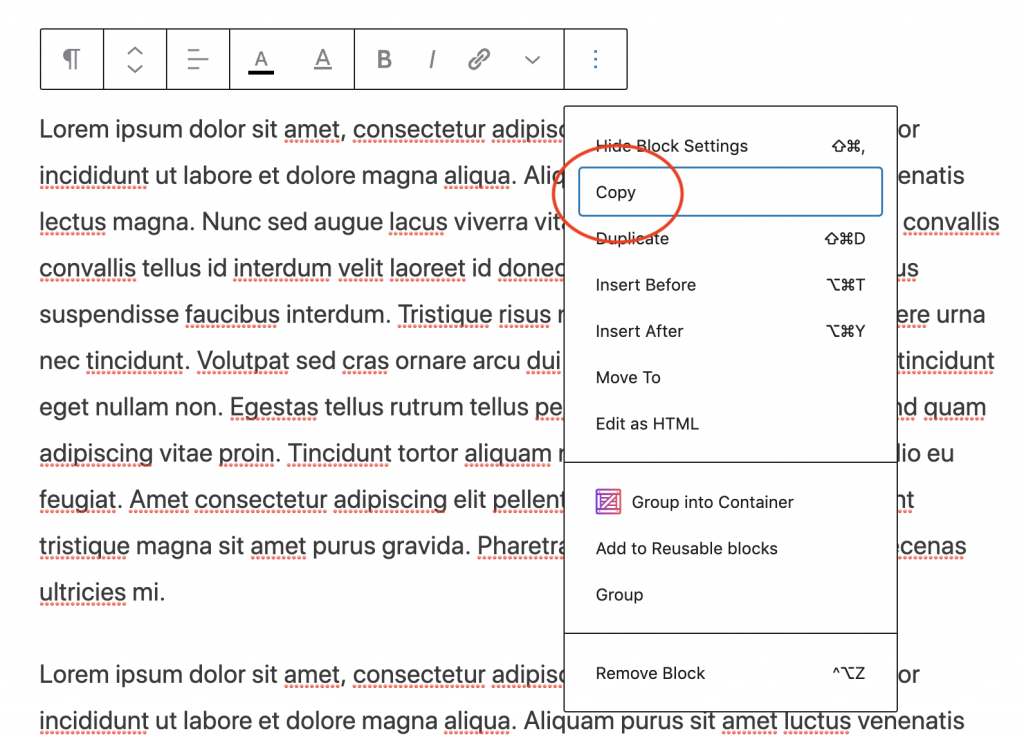
You can also move blocks around by using the copy and paste function. Use the block settings menu and select the ‘Copy’ option, as shown in the screen shot below. This copies the block to your clipboard.

You can then place the cursor in the block into which you want to move your block (for example inside a column block or a section block) and right click. Then select ‘paste’ from the options and your block will be pasted in. Remember if you use this method that you will still need to delete the block from its original position, otherwise you’ll see it twice on your page. You can do this exactly as before by selecting ‘Remove Block’ from the block options menu.


